How To Build A Custom DIY Mailbox Post
As all homeowners know, curb appeal is essential. Sometimes curb appeal can help sell a house before the buyer opens the front entrance door. A custom DIY mailbox post is an excellent way of putting your own touch on the property.
A mailbox is often the first thing people see when they visit your property, curb appeal again. There it is, standing tall and proud in the yard, a welcome for friends and family and, of course, the mailperson each morning. If yours is in disrepair, now is the time to build a replacement.
It is a great project for the fall or any time of the year. The finished mailbox can be as detailed as you want it to be, but first, stock up on the materials. The list of what you need to build a custom DIY mailbox post includes:
- 1 - 4” X 4” pressure treated or cedar wooden post (10-foot long)
- 1 - mailbox – from your local hardware store
- Exterior fasteners (galvanized or stainless)
- Hammer
- Drill
- Screwdriver
- Fence Armor® Post Guards and RotGuard sleeves
Let’s follow a few steps to get that mailbox made.
NOTE: If you are working on wood fences instead, we offer the right fence tools you need for your wood care, including fence post pullers. We even offer stain machines for your wood fence posts.
Step 1: Do not throw out the old one
If you have an old mailbox, be sure not to throw it away. It can look as good as new with a fresh coat of exterior grade paint. Most mailboxes are designed to last, and the older the box, the more character, and curb appeal it may have, which you might not get with a new one.
Your problem may be the mailbox post. If it is an old one, it made need replacing. A new, custom DIY mailbox post or one only a few years old, will need a coat of stain and some Fence Armor® products for extra protection.

Step 2: Be sure to keep within the guidelines
It is very important to stick with the guidelines when dealing with a mailbox
Before you start measuring and cutting, you need to make sure you meet the United States Postal Service (USPS) guidelines. If you would like to read more, head to www.usps.com/manage/mailboxes.htm for further instructions. If you are in Canada, you will need the Rural Mailbox Guidelines at: https://www.canadapost.ca/cpo/mc/assets/pdf/personal/rmb_guidelines_e.pdf.
The helpful diagram below will guide you through all you need to know when building a custom DIY mailbox post.
If you plan to dig on your property, whether in the USA or Canada, it is essential to call http://call811.com/ before you break ground.
You never know what utility lines or pipes lie beneath the earth - hitting one can cost you.

Step 3: Plan how to build the custom DIY mailbox post
It is crucial to plan out the design before you cut the wood. There is an old saying, ‘measure twice, cut once,’ which can save you time and money.
When you begin to build the custom DIY mailbox post, you will need a set design to follow. You will need to cut out notches in the horizontal and vertical lumber so they can connect. The notches or mortise will need to be cut at half of the depth of your lumber so they fit snugly, perpendicular to each other. A circular saw is the fastest tool for this, and you will want to step it across the mortise. When you have made the cuts, then chisel out the pieces. You can also do this work with a hand saw, but it will just be more labor-intensive.
The rest of the design is where you can get creative and personalize the mailbox. You’re adding curb appeal but be sure it adheres to the rules of your Home Owners Association or the Condo Association.
Always ask before you do any permanent outside work.

Step 4: Put the mailbox together
Once you have the notches and lumber cut for your design, you can slide the arm into place. It is crucial to have 45-degree angle support to hold the mailbox up in place.
Fix the arm to the custom DIY mailbox post with exterior grade glue or the proper fasteners. Often people use both but make sure you use top-quality products suitable for your climate.

Step 5: Putting the mailbox post in the ground
Pick a suitable spot in the front yard for the post. Again, make sure you follow all guidelines for both above and below the ground work.
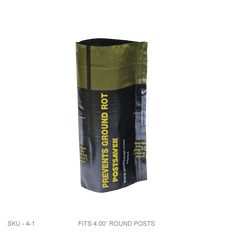
Before you set the post in the dirt, make sure you attach the Fence Armor® RotGuard Sleeve. The easy to attach sleeve will protect the post above and below the ground-line from rot, moisture damage, and termites.
Set your post where you would like it, and you are nearly finished. If your post is near grass that will come in contact with a weed trimmer, we strongly suggest installing Fence Armor® Mailbox Post Guards. Like our Postsaver® sleeves, this product protects the post and will give it a long life.
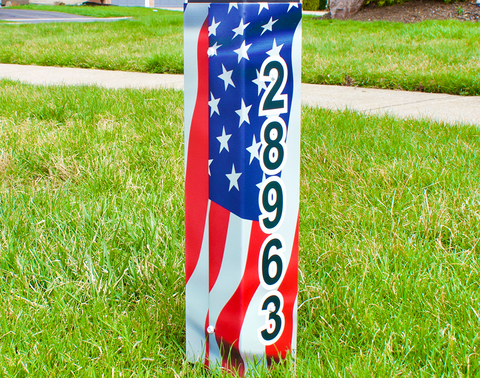
If you are interested in giving your custom DIY mailbox post itself some personality and curb appeal, you can personalize it with our Patriotic Edition, where you can have your house number embedded for an extra touch.
Call us - 888-289-5617
You now have a custom DIY mailbox post with eye-catching curb appeal. We hope you enjoy it for many years to come. Please pass on this Fence Armor® guide for others to make one for their home. Call us today for all your fence and post protection needs.
Here are some more Fence Armor products and collections you can check out to protect your mailboxes and fences:
Fence Post Puller | Stain Machine | Fence Staining Equipment | Wood Care | RotGuard Rot Barrier Protector | Fence Post Guard | RotGuard Sleeve | Speed Square | Mr Fence Tools | Semi Transparent Stain | Chain Link Fence Bottom Guard | Stain Stripper | Fence Guard | Mr Fence Protector | Wood Fence Tools | Expert Stain and Seal | Decorative Fence Post Caps | 4x4 Post Protector | Fence Finials | Framing Jig | Vinyl Fence Rail Removal Tool | 4x4 Deck Post Anchors | Fence Protector | Aluminum Balusters | Mailbox Post Protector | Fence Hangers | EZ Template | Baluster Connectors | Fence Stains
Shop Postsaver® - Rot Barrier

Shop Stain & Seal - Wood Stain


