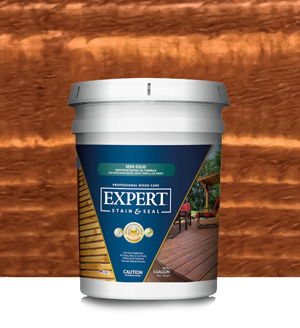
A Step-by-Step Guide to Staining Your Wood Fence
A well-maintained wood fence not only adds beauty to your property but also protects it from the elements. One crucial aspect of keeping your wood fence in top shape is staining. In this blog post, we'll walk you through a step-by-step guide on how to stain a wood fence, ensuring its longevity and enhancing its natural beauty.
NOTE: If you are working on wood fences, we offer the right fence tools you need for your wood care, including fence post pullers.We even offer stain machines for your wood fence posts.
Check out Expert Stain & Seal's Great Selection
Prepare Your Fence
Before you start staining, it's essential to prepare the fence properly. Begin by inspecting the fence for any loose boards, nails, or damaged areas. Replace or repair them as needed. Next, clean the fence using a power washer or a stiff brush and soapy water to remove dirt, mold, and mildew. Rinse thoroughly and allow it to dry completely.
Choose the Right Stain
Selecting the right stain for your wood fence is crucial. Consider factors such as the type of wood, desired finish, and the level of protection needed. Stains come in different types, including water-based, oil-based, and solid color stains. Each type has its advantages and application methods. Consult with a professional or a hardware store expert to choose the best stain for your fence.
Gather the Necessary Tools and Materials

To ensure a smooth staining process, gather all the necessary tools and materials. These typically include a paintbrush or sprayer, drop cloths, painter's tape, sandpaper, gloves, a respirator mask, and the selected stain. Having everything at hand will make the process more efficient and enjoyable.
Apply the Stain
Now it's time to apply the stain to your wood fence. Start by protecting nearby plants, grass, or structures with drop cloths and painter's tape. If you're using a brush, dip it into the stain and apply a thin, even coat to the wood, working in small sections. For larger fences, consider using a sprayer for faster application. Ensure that the stain is evenly spread and penetrate into the wood grain.
Let it Dry and Assess
Allow the stain to dry according to the manufacturer's instructions. This typically takes anywhere from a few hours to a couple of days, depending on the stain type and weather conditions. Once dry, assess the color and coverage. If desired, apply a second coat for a deeper hue or enhanced protection. Be sure to follow the manufacturer's guidelines for reapplication.
Clean Up and Maintenance
After you've finished staining your wood fence, clean up any brushes or sprayers using the appropriate cleaning agents. Dispose of any leftover stain or materials responsibly. To maintain the beauty and longevity of your fence, consider regular cleaning and re-staining every few years, depending on the wear and tear.
Conclusion
Staining your wood fence is a rewarding and essential step in its maintenance. By following this step-by-step guide, you can ensure that your fence not only looks beautiful but also stands strong against the test of time. Remember, proper preparation, choosing the right stain, and applying it correctly are key to achieving a long-lasting and visually appealing fence. So, roll up your sleeves, gather your tools, and give your wood fence the care it deserves!
Here are some more Fence Armor products and collections you can check out to protect your fences:
Fence Staining Equipment | Post Rot Protector | Fence Post Guard| Post Saver Sleeve | Mr Fence Tools | Semi Transparent Stain | Chain Link Fence Bottom Guard | Stain Stripper | Fence Guard | Fence Post Sleeve | Fence Finials | Vinyl Fence Rail Removal Tool | Fence Protector | Mailbox Post Protector | Fence Hangers | EZ Template | Baluster Connectors | Fence Stains | Semi Solid Deck Stain | Fence Guard | Fence Post Protector |Post Protector 4x4 | Post Preserver | Metal Fence Trim | Fence Buddy | Post Skirt


